
Right message, right segment.
A playbook for audience targeting and content personalization — build segments from behavior and attributes, then serve dynamic content to each.
Start Now →Same site. Different visitor. Different experience.
1The 3-Step Setup
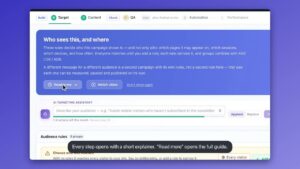
From the Personyze Dashboard, select the Targeting and Personalization wizard. This is your command center.
View Activation Guide
Step 1: Choose Your Objective
Select "Targeting and Personalization" to start tailoring banners, popups, or messages.
Step 2: Define Your Audience
- Ask the AI: Type "Target visitors from the US who have visited the pricing page more than twice."
- Manual Builder: Click "Add targeting rule" to mix criteria like Cart Value, Device Type, or Traffic Source.
Step 3: Create Content & Creative
Click "Add action" and select "Popup, Banner & HTML Builder".
- Templates: Browse the library for professional designs like Lead Forms, Countdowns, and Popups.
- AI Creative Generation: Click "Edit action with AI" to generate both design and copy (e.g., "Write a catchy headline and apply a red background").
- Manual Editing: Type text directly like "Sign Up Now" using the visual tools.
Go Further: Optimize & Launch
A/B Testing (Optional)
Want to optimize? Toggle A/B Status to "ON". This allows you to add multiple variations and split traffic to find the winner automatically.
Quality Assurance (QA)
Before publishing, use the QA tools:
- Test Mode: Save to "Test" to view the campaign without showing it to live visitors.
- Simulator: Simulate specific user conditions (e.g., "Visitor from France") to see which campaigns trigger.
- Shareable Links: Generate a preview link to send to colleagues.
Track Performance
After your campaign is live, track its impact:
- Real-Time Metrics: View immediate data on Impressions, Clicks, and CTR.
- Detailed Reports: Analyze deeper ROI metrics like Purchases, Conversions, and Bounce Rate (updated after visitor sessions end).
2Recipe: The Seamless Content Insert
Great for SaaS companies promoting an ebook or guide inside a blog post without interrupting the reading flow.
Step-by-Step Configuration
1. Targeting
Target readers interested in a specific topic using "Content Interaction" or "Pages Visited" rules.
2. Create Content & Creative
Select "Popup, Banner & HTML Builder". Use the WYSIWYG editor to design a banner that fits your site's width.
- AI Creative: Ask the AI: "Create a native-looking blog banner with the text 'Download our 2024 Guide' and a blue button."
3. Placement & Rotation
- In the action editor, go to Display settings and select Show in placeholder.
- Multiple Banners: You can create multiple campaigns targeting the same placeholder. Personyze will rotate them automatically. Use the **Priority** settings to favor one over others.
4. Variations
Pro Tip: Inside the content editor, click Variations to show different images based on industry (e.g., Finance vs. Tech) within the same campaign unit.
3Recipe: The Notification Bar
Great for announcing a new feature or webinar inside your app or blog without being annoying.
Step-by-Step Configuration
1. Targeting
Ask the AI: "Target returning users who have visited the Features page but haven't signed up yet."
2. Create Content & Dynamic Variables
Choose a slim Top Bar template.
- Dynamic Personalization: Click the "Dynamic Variable" button to insert: "Welcome back [User Name]! Join our webinar."
3. Placement
In Display settings, choose Show in popup and select "Top Bar". Or use Show in placeholder to embed it into your header.
4. Frequency Capping
Prevent annoyance by using the "Don't show if..." settings. Set it to stop showing if the user has Closed the bar 1 time.
4Recipe: The Local Perk (Geo-Targeting)
Great for boosting conversion rates by showing visitors offers relevant to their specific country (e.g., Free Shipping).
Step-by-Step Configuration
1. Targeting
Select the Countries/Cities rule and check "United Kingdom" (or your target region).
2. Create Content & Creative
Use the WYSIWYG Editor to customize a "Sticky Footer" template.
- Dynamic City: Insert the variable
[User City]to read: "Free Shipping to London today!" - Time-Based Variations: Use Variations to change text to "Good Morning!" or "Good Evening" based on the user's local time.
3. Placement
In Display settings, choose Show in popup and select the "Bottom / Footer" position.
5Recipe: The Cart Saver Popup
Great for recovering revenue from visitors about to leave your site without buying.
Step-by-Step Configuration
1. Targeting
Add a rule for Cart Value greater than 0. Optionally exclude users who have already purchased.
2. Create Content
Use the WYSIWYG / AI Editor to design a high-contrast Popup. Ask the AI: "Write a persuasive headline to stop cart abandonment and offer a 10% code."
3. Placement
In Display settings, choose Show in popup and select a central position like "Lightbox".
4. Trigger
Go to "Display scenario" and select On predicted site leave intent. This smart exit trigger detects when the mouse moves to close the browser tab.
6Recipe: The Newsletter Form (Scroll Trigger)
Perfect for content sites and publishers to grow their subscriber list directly within article content.
Step-by-Step Configuration
1. Targeting
Target new visitors reading articles in specific categories (e.g., "URL contains /blog/marketing").
2. Create Content (Lead Form)
Click "Add action" and select "Lead Capture Form".
- Design: Choose an inline template that matches your blog's width.
- Fields: Use the editor to add/remove fields (Name, Email, Company) and customize the button text.
3. Placement
- Option A (Inline): Select Show in placeholder and use the Visual Simulator to click *between* paragraphs in your article.
- Option B (Popup): Select Show in popup (Center or Slide-in) for a more aggressive approach.
4. Trigger (Scroll Based)
Instead of showing immediately, go to "Display scenario" and select "After scrolling to % of page". Set it to 50% so the form appears only after the reader is engaged.
7Recipe: The Sale Countdown Bar
Drive urgency for a limited-time subscription offer using a highly visible top bar with a timer.
Step-by-Step Configuration
1. Targeting
Target all visitors who are not currently subscribed (e.g., exclude "Subscriber" segment).
2. Create Content & Creative
Click "Add action" and select "Countdown Timer". Choose a Top Bar template.
- AI Creative: Ask the AI: "Create a sense of urgency text like 'Sale ends in...' and set the timer to end this Friday."
3. Placement
In Display settings, choose Show in popup and select the "Top" position for a sticky bar that stays visible as they scroll.
4. Trigger
Select On page enter to create immediate urgency.
8Recipe: ABM Account Targeting
Impress high-value B2B prospects by personalizing the experience with their company name.
Step-by-Step Configuration
1. Targeting (IP Intelligence)
Use the "User Profile" rules to target based on the visitor's identified company. Example: "User's Company Name is not empty."
2. Create Content & Variables
Create a Banner or Hero section overlay.
- Dynamic Insert: Insert the variable
[User Company]into the headline. - Result: "Special Pricing for IBM Employees" or "Welcome Microsoft Team."
3. Placement
Use Show in placeholder to replace your site's standard Hero Title with this personalized version.
9Recipe: Weather-Based Promotion
Increase relevance by aligning your offer with the visitor's local weather conditions.
Step-by-Step Configuration
1. Targeting
Select the "Weather" rule. Choose conditions like "Rainy" or "Snowy" and set a temperature range (e.g., < 10°C).
2. Create Content
Use the AI Editor to create a context-aware popup.
- AI Command: "Create a popup promoting umbrellas with a rainy background image."
- Dynamic Text: "It's raining in [User City]! Stay dry with 20% off umbrellas."
3. Placement
Choose Show in popup (Side or Bottom corner) so it feels like a helpful alert rather than an intrusive ad.
10Level Up: A/B Testing & Optimization
Don't guess. Prove which message works best using the built-in split testing tool.
How to set it up
1. Enable Testing
In your Campaign Content step, toggle the A/B status switch to ON.
2. Create Your Groups
- Group A: Drag your first content widget here (e.g., "10% Off Popup").
- Group B: Click "ADD GROUP" and drag a second version here (e.g., "Free Shipping Popup").
- Control Group: Leave 20% traffic for "Site Original" to measure uplift against doing nothing.
3. Define Success
Scroll down to "Set test goal" and pick your KPI: Products purchase (Revenue), Lead submission, or Clicks.
4. Set It and Forget It
Toggle Auto adjust rotation to ON. Personyze will automatically shift traffic to the winning variation maximizing your results.
Playbook questions, answered.
Common questions about audience targeting and content personalization. Anything else, our team is one message away.
What is a "Placeholder"?
A Placeholder (or Zone) is simply a designated area on your website where Personyze can inject personalized content. It replaces the need for popups by making content feel native. You select these areas using our visual point-and-click tool without coding.
Can I target mobile users differently?
Yes. You can create separate campaigns or variations for "Mobile" vs "Desktop" to ensure the design fits perfectly. For example, show a large banner on Desktop but a small sticky footer on Mobile.
How does the Exit Intent trigger work?
The "Predicted Site Leave" trigger detects when a user's mouse cursor moves quickly towards the top of the browser window (to close the tab or switch URL), instantly firing your popup to recover the session.
Can I A/B test my popups?
Yes. You can test different headlines, colors, or offers (e.g., "10% Off" vs. "Free Shipping") to see which one drives more conversions. Personyze will automatically track the winner.
Will this slow down my site?
No. Personyze loads asynchronously, meaning it runs in the background and does not block your main page content from loading. This ensures optimal site speed and Core Web Vitals scores.
Do I need a designer?
No. You can use our library of pre-made templates or the "Edit with AI" feature to generate professional designs and copy just by typing a prompt like "Create a red holiday banner."
Can I personalize based on past purchases?
Yes. If you sync your transaction data or cart status, you can show targeted upsells (e.g., "Complete your set") or hide promotions for products the user has already bought.
How do I stop showing a popup after someone closes it?
Use the "Frequency Capping" settings. You can set a rule to "Stop showing if user closed X times" or "Stop showing if user converted," ensuring a good user experience.
Can I target users by location?
Yes. Personyze automatically detects the visitor's City, Region, and Country from their IP address. You can show localized offers like "Free Shipping to London" without asking for their location.
Does it work on Single Page Applications (SPA)?
Yes. Personyze is fully compatible with React, Angular, and Vue. Our tracker detects virtual page changes automatically, ensuring triggers fire correctly as the user navigates your app.
Can I insert the user's name?
Yes. If the user is logged in or has visited from an email campaign, you can "grab" their name and insert it dynamically into your banners (e.g., "Welcome back, John!").
What types of widgets can I create?
You can create Popups, Banners, Ribbons, Embedded HTML content, Recommendation Widgets, Countdown Timers, Lead Forms, and Feedback Surveys.
How do I verify it's working before going live?
Use the Simulator tool. It allows you to view your site as if you were a specific user (e.g., "Simulate Visitor from France") to verify that the correct personalization triggers appear.
Can I target companies (B2B)?
Yes. Using our ABM (Account-Based Marketing) features, you can target visitors based on their Company Name or Industry (e.g., "Special offer for IBM employees") using Reverse IP data.
Is the data secure?
Yes. Personyze is GDPR and CCPA compliant. All data is encrypted, and we offer strict privacy controls to manage user consent and data retention.
Reach every audience.
You have the full playbook — now target each segment with content tailored to who they are and how they behave.