On your site
Website PersonalizationContent, offers and layout shaped to each visitor — one profile across every page and every session.Recommendation EngineWhat each visitor wants next, ranked by the algorithm you pick or one you write.A/B TestingA winner per audience, promoted mid-campaign rather than after it.Dynamic Landing PagesThe whole page recomposed per visitor — headline, imagery and offer from the ad they clicked and their own interests. On pages you already run.AI Search & Chat AgentAnswers from your own pages and catalogue, and a search box that replies in a sentence.Banners & Pop-UpsRight message, right moment, right page — without a developer.Social ProofLive scarcity, ratings and what other people just did.Off your site
Email PersonalizationContent and recommendations picked per reader at open time — sent from Personyze or pasted as one block into your ESP.Push, SMS & WhatsAppFired by what they just did rather than by a schedule.Hosted Landing PagesThe same per-visitor page, served by us — your domain or ours, no site to deploy to.Know who they are
Behavioral TargetingSegments that update themselves from what people actually do.Audience DiscoveryPlain-language audiences found in your own data — visitors who convert several times more often than average, targetable in a click.ABM MarketingThe company behind an anonymous visit, joined to your CRM.Website AnalyticsSessions, bounce and revenue — then click a row and there is a person.Build & connect
MCP ServerRun your account from Claude, ChatGPT or any MCP client.IntegrationsHubSpot, Salesforce, Twilio Segment, Tealium, GTM and the REST API.APIs, SDKs & AutomationOne REST endpoint over every object, server and mobile SDKs, rules and reports that run on their own.By industry
EcommerceRecs, offers and journeys that lift average order value.SaaSLifecycle personalization from trial to renewal.B2BIdentify the account, personalize by industry.Publishers & MediaPer-reader front pages and newsletters.Travel & HospitalityRecover searches, grow repeat bookings.EducationProgram recommendations that lift enrollment and completion.By outcome
Conversion OptimizationA winner per audience, not one per site.Marketing PersonalizationSite, email, push and pages from one profile.All solutionsEvery industry playbook in one place.Learn
BlogInsights from the people who run the engine.Personalization ExamplesReal scenarios, with the numbers.PlaybooksCopy one and run it this week.Wiki / DocsSetup guides, feature how-tos and the full knowledge base — every screen documented.Personyze DeckThe whole platform in 27 slides — flip through it or take the PDF.Build
Wiki / DocsEvery setup, documented.IntegrationsConnect what you already run.ROI CalculatorsWhat it is worth on your traffic.Company
About UsHow we got here, where we are going.Switch to PersonyzeMove off your vendor with zero downtime.ContactSales, support and billing.FAQThe questions that come up first.PartnersAgency, reseller and technology partners.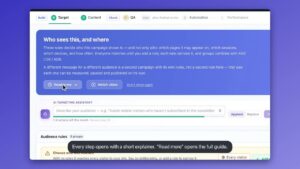 VideosProduct TourShort narrated videos of the real platform, one feature at a time.