Quick and Easy Installation
Personalization with Google Tag Manager
Installing our personalization engine on your site with Google Tag Manager is a copy-paste process that takes five minutes or less. Once this tag is operational, Personyze is able to do everything it does, from tracking visitors across sessions to showing personalized content across site, emails, and apps, with no additional back-end setup in your CMS.
Targeting based on a 360° customer view
Target personalized content, site messages, and emails, based on multiple data sources like site behavior, demographics, location, CRM data, referral, weather, social profile, cart transactions, and more.
Personalizing Across Site, Email, & Apps
Easily personalize the entire visitor journey with optimized page content, targeted promotions with dynamic behaviors, product/content recommendations, personalized remarketing emails, and recommendations embedded in your native app.
Harness Machine Learning Algorithms
Recommend products your visitors will want to buy and content they love to read, by leveraging multiple AI algorithms, crowd wisdom, and unique visitor characteristics and interests, for a highly personal experience.
Integrate Your Data & Put It to Work
Synchronize your data automatically, or upload your user email lists, CRM data, and product catalog. Connect your CRM solution using easy integration, webhooks, and our robust API.
In this guide, you can see step-by-step on how to use the GTM to load Personyze on your page.
Google Tag Manager should be installed before you follow this guide.
We encourage you to add the snippet as early in the execution path as possible.
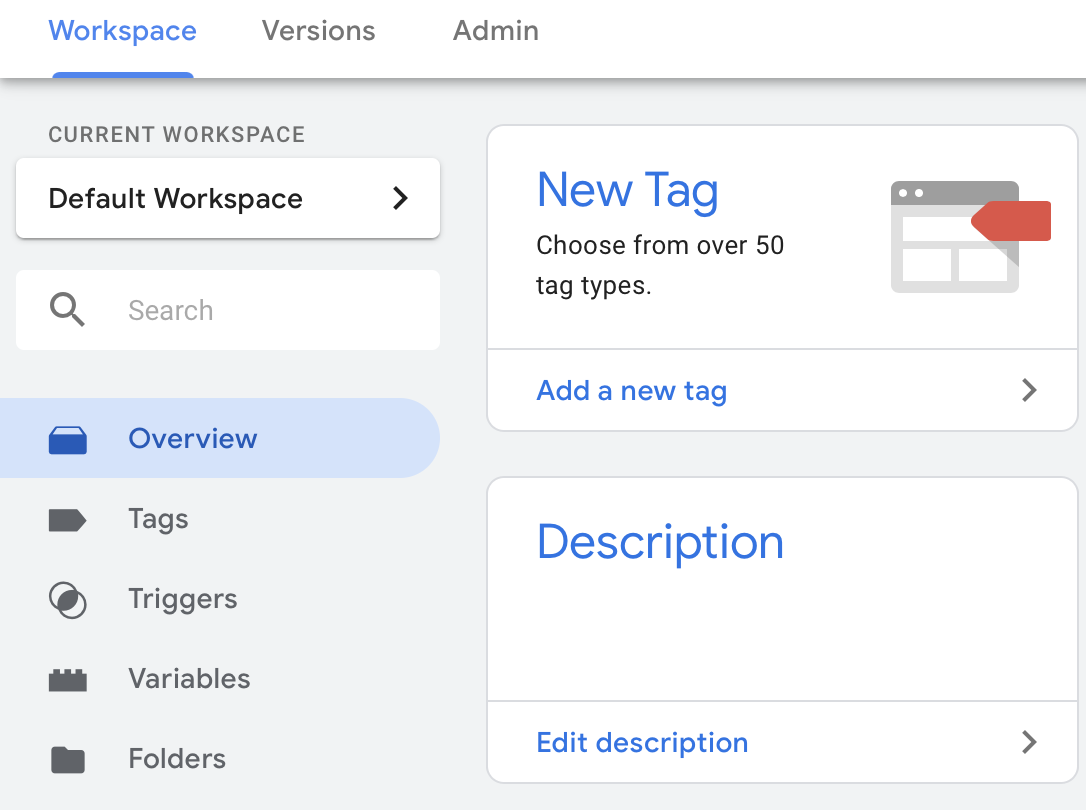
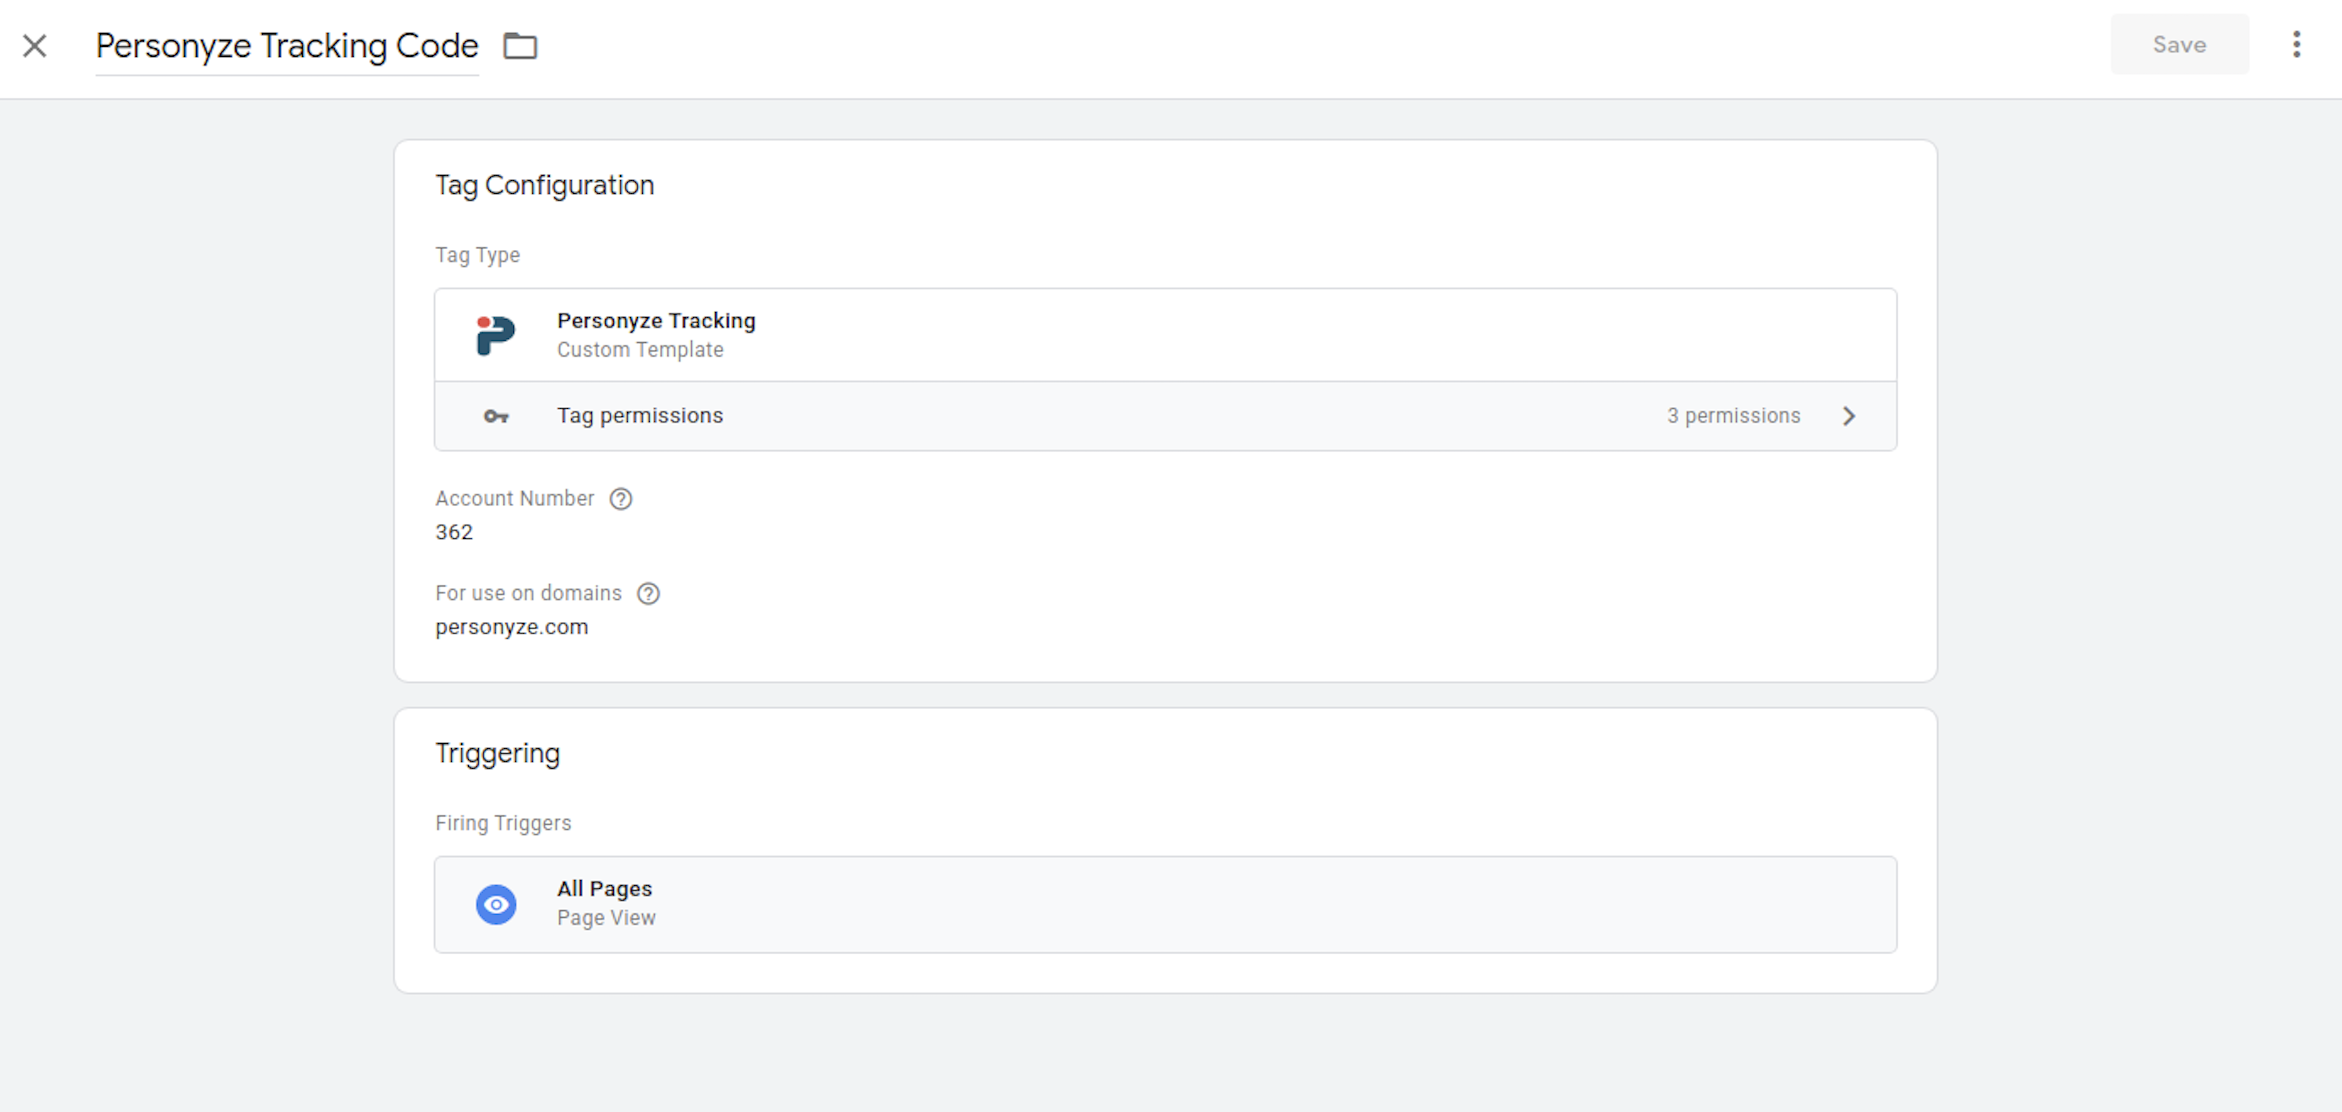
In GTM, click Add a new tag.
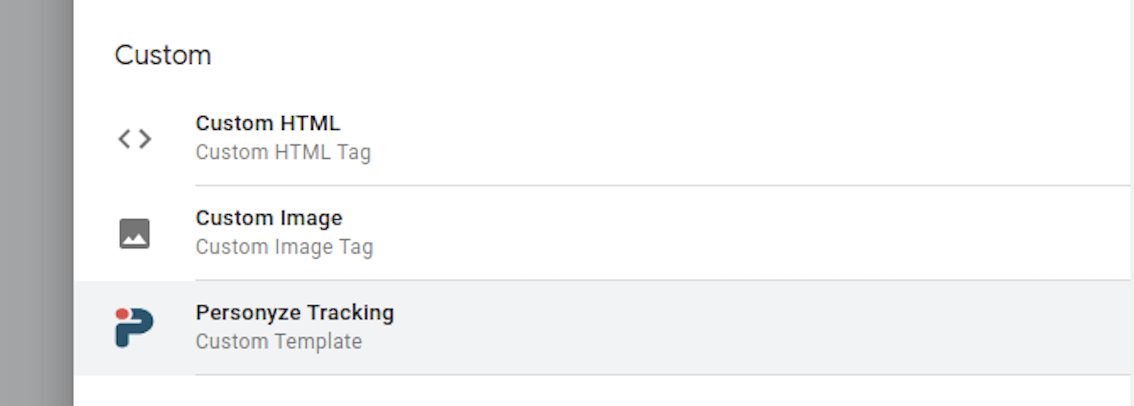
Click the tag icon & select Personyze Tracking Code from the list.
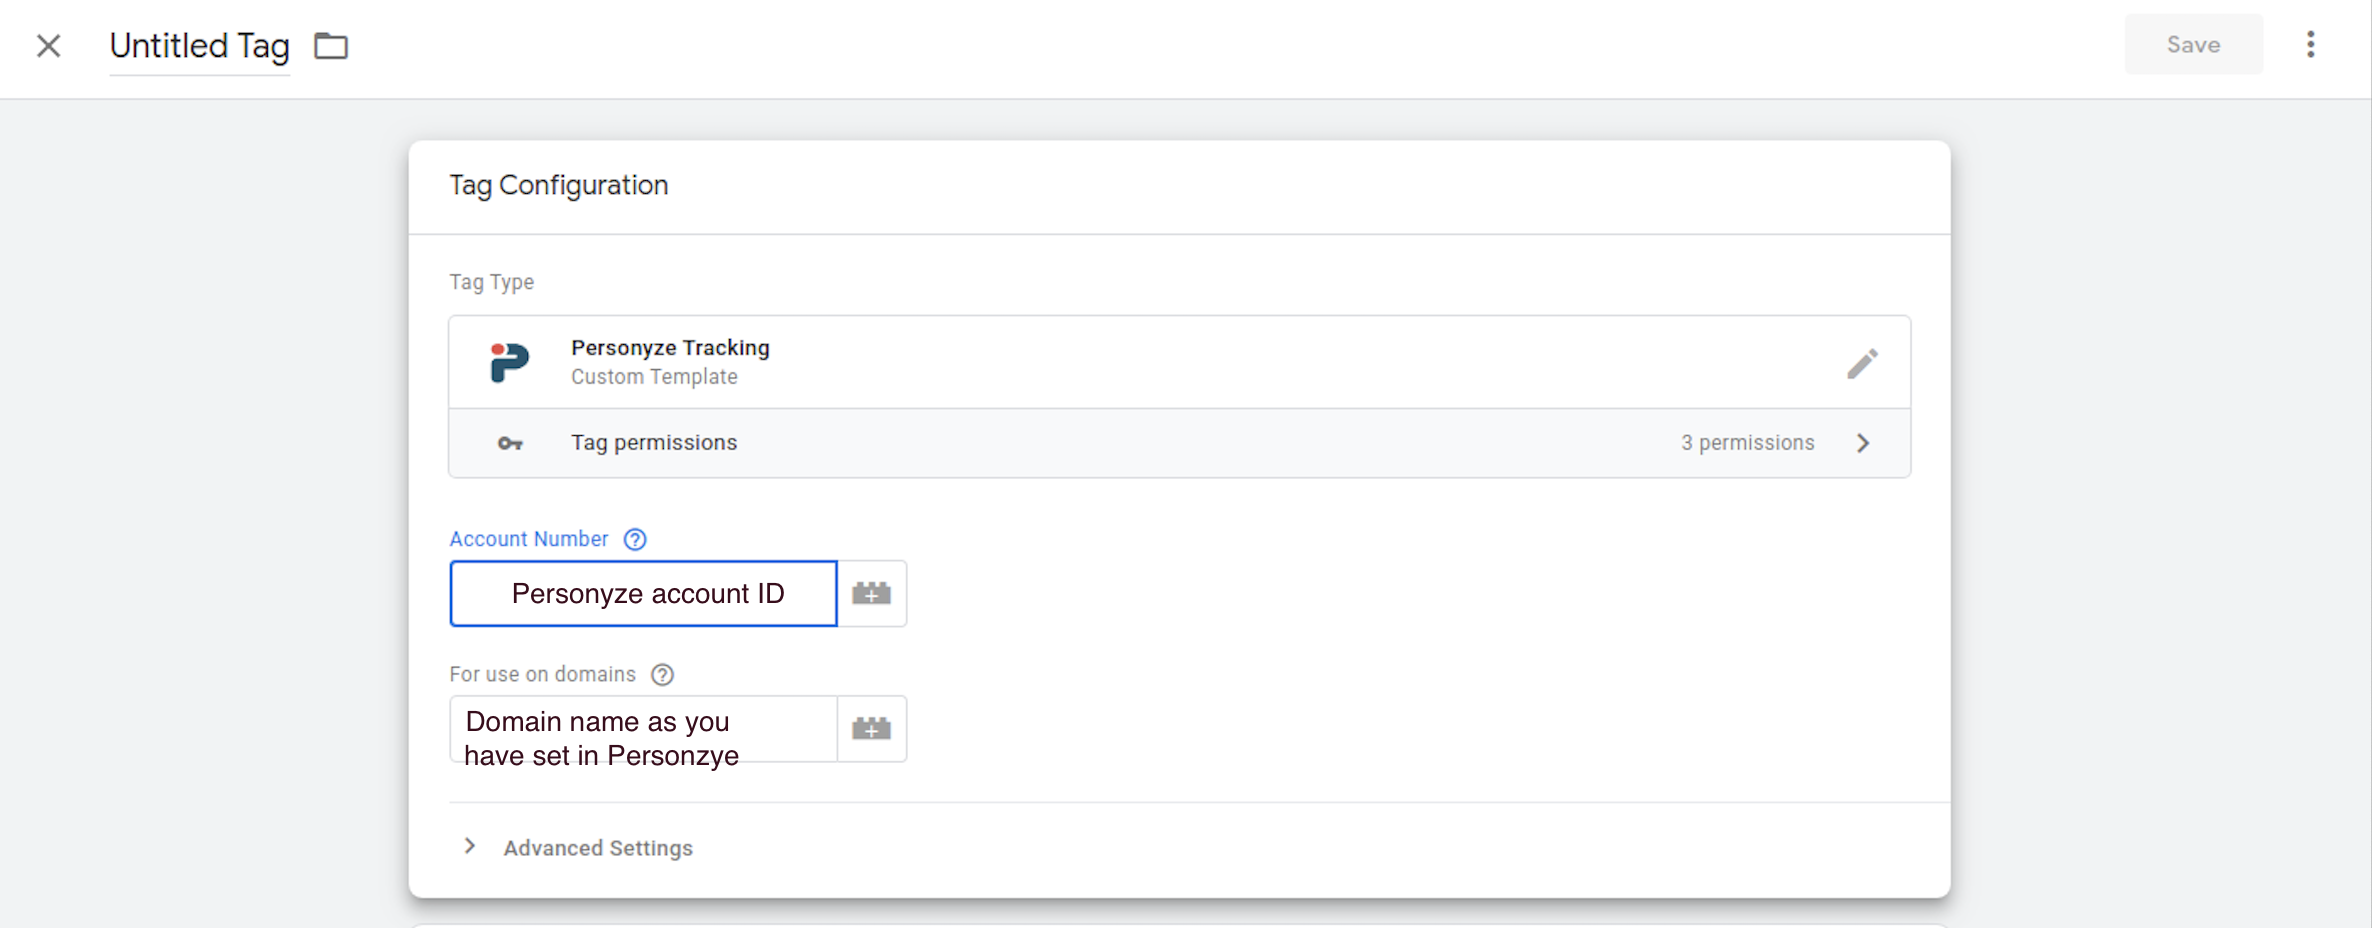
Enter your Personyze Site ID into the text field.
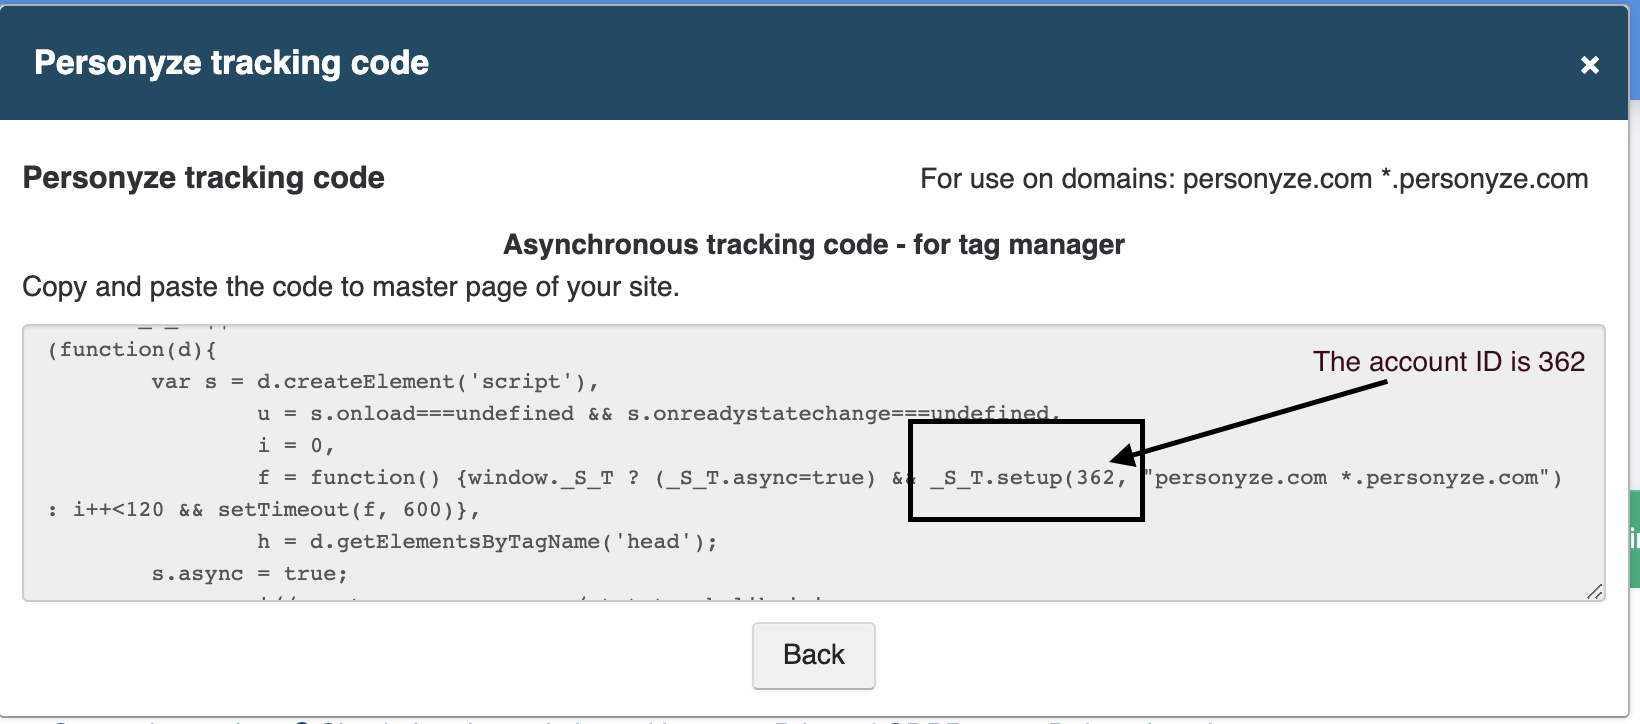
If you don’t know your Personzye account ID, go to settings > Domains And Tracking > click on Get Tracking Code, and look for the S_T number.
Select All Pages for the trigger.
Single Page Applications should only use the “Page View” trigger type
Google Tag Manager’s state change triggers conflicts with Personyze’s own system for detecting changes in single-page applications. For more information, take a look at the Google Tag Manager article about the Page View trigger.
Click on the Publish button to publish the tag.
With that done, you should be ready to implement website personalization via tag manager.
Imagine going to a store where the front shelves are stocked only with products that you like, or reading a newspaper where the stories you’re interested in move to the front page.
This isn’t possible in the brick-and-mortar or print world, but with our powerful recommendations, this is easy to set up on your website.

